First steps with vlayer
Creating a new project
Run this command to initialize a new vlayer project:
vlayer init project-name
It creates a folder with sample contracts.
Adding to an existing project
Use the --existing flag to initialize vlayer within your existing Foundry project:
cd ./your-project && vlayer init --existing
Example project
To initialize a vlayer project with example prover and verifier contracts, use the --template flag as shown below:
vlayer init simple --template simple
The following templates are available for quick project setup:
simple: Prove an ERC20 token balance at a specific block number.simple-email-proof: Mint an NFT to the owner of an email address from a specific domain.simple-teleport: Prove a cross-chain ERC20 token balance.simple-time-travel: Prove the average ERC20 token balance across multiple block numbers.simple-web-proof: Mint an NFT to the owner of a specific X/Twitter handle using Web Proofs.kraken-web-proof: Generate server-side web proof of ETH to USD exchange rate and store it on-chain
Directory structure
The vlayer directory structure resembles a typical Foundry project but with two additional folders: src/vlayer and vlayer.
src/vlayer: Contains the Prover and Verifier smart contracts.vlayer: Has contract deployment scripts, client SDK calls to the prover, and verifier transactions.
Running examples
❗️ Make sure that you have Bun installed in your system to build and run the examples.
First off, build the contracts by navigating to your project folder and running:
cd your-project
forge build
This compiles the smart contracts and prepares them for deployment and testing.
Please note that
vlayer initinstalls Solidity dependencies and generatesremappings.txt. Runningforge soldeer installis not needed to build the example and may overwrite remappings, which can cause build errors.
Then, install Typescript dependencies in vlayer folder by running:
cd vlayer
bun install
Testnet
In order to use the testnet, you will need to provide a couple of secrets.
Firstly, create vlayer/.env.testnet.local - this is where you will put all your secret keys in.
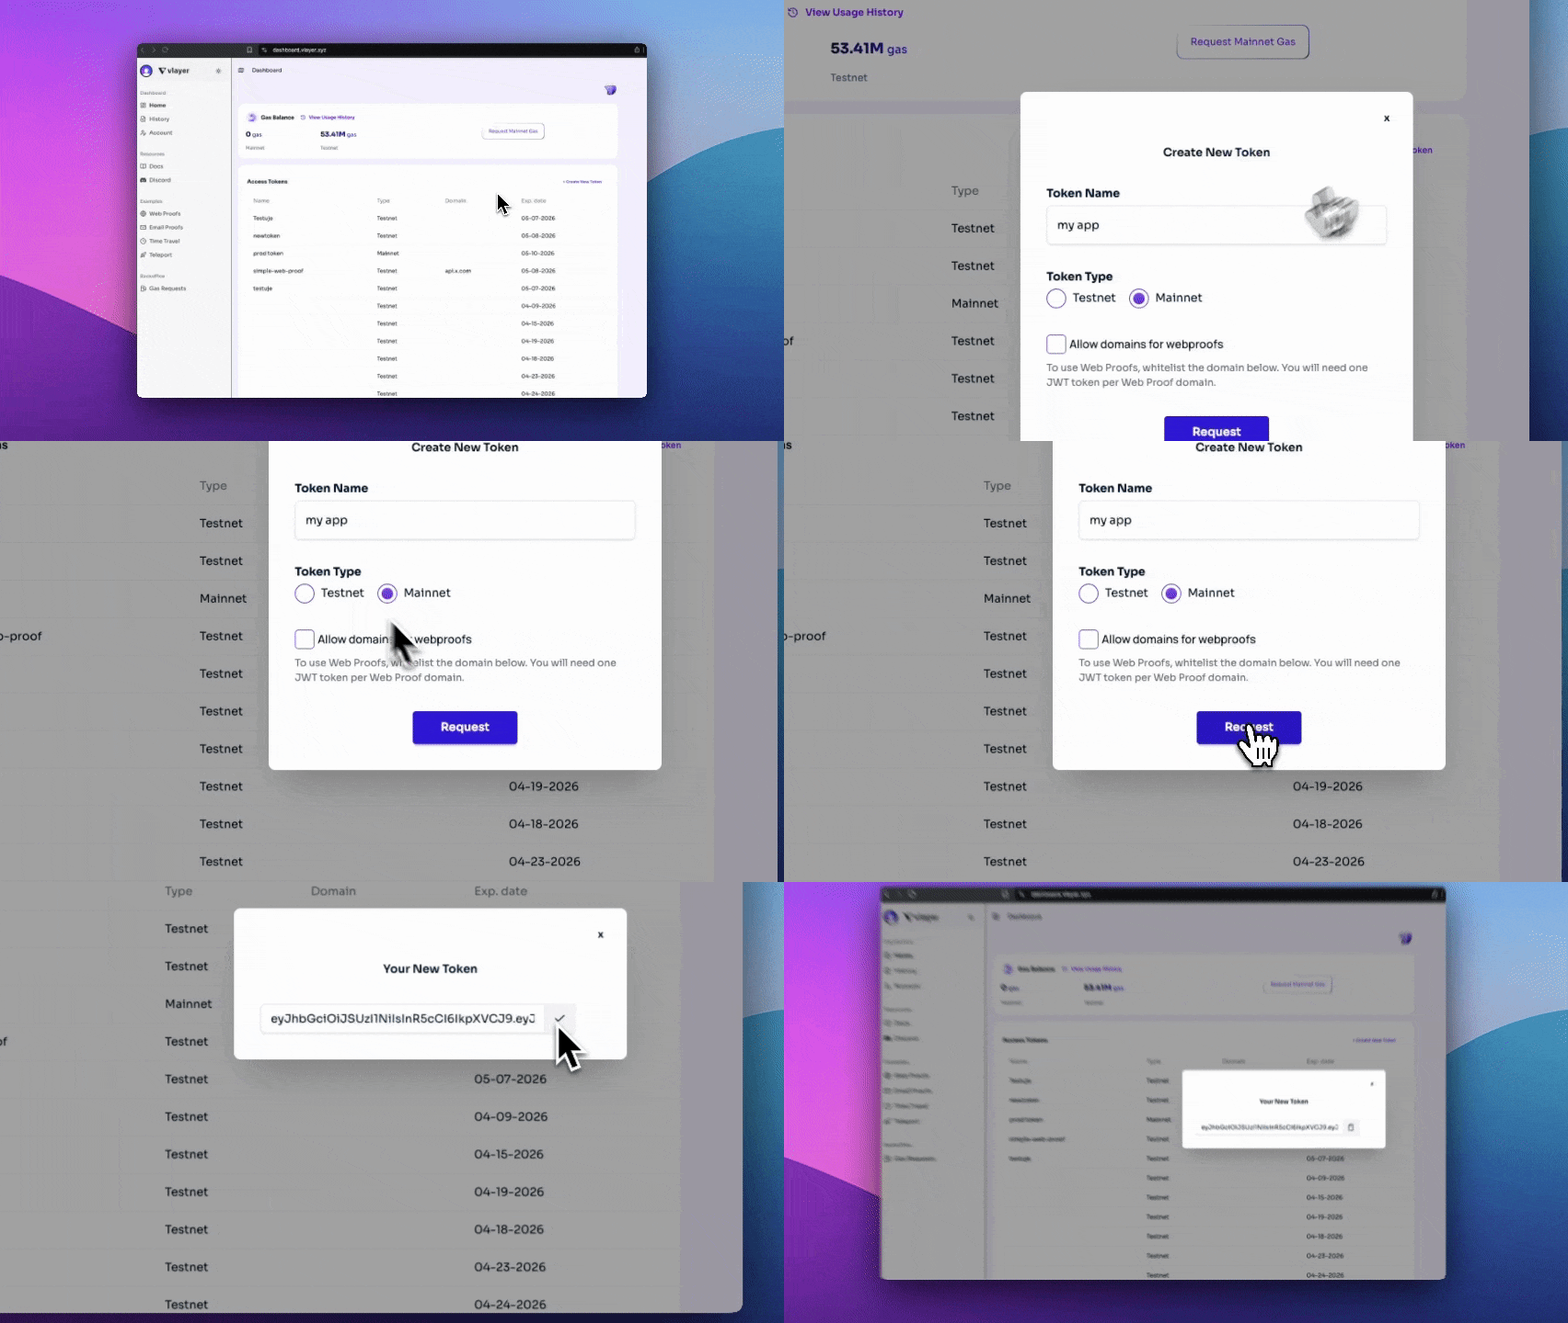
Sign up or Log in to dashboard.vlayer.xyz and generate a new testnet Json Web Token (JWT).

Copy generated token (it won't be visible ever again) and save it in vlayer/.env.testnet.local
VLAYER_API_TOKEN=...
❗️ It is important to note that the JWT token is valid for 1 year after which you will need to generate a new token to continue developing using vlayer.
Next provide a private key for deploying example contracts and sending transactions to the verifier in the vlayer/.env.testnet.local file as
EXAMPLES_TEST_PRIVATE_KEY=0x....
By default, optimismSepolia is configured in the vlayer/.env.testnet file. However, you can override this setting to use other testnets.
To change the desired network, set the CHAIN_NAME and JSON_RPC_URL environment variables in vlayer/.env.testnet.local.
Once configured, run the example from within the vlayer directory using:
bun run prove:testnet
Local devnet
Running examples on a local devnet requires deploying a local instance of the prover and anvil. If you want to run on local environment, use Docker:
$ bun run devnet:up
This command will start all required services in the background.
Once the devnet is up, run the example from within the vlayer directory:
bun run prove:dev
Production
In order to use the production, you will need to provide a couple of secrets.
Firstly, create vlayer/.env.mainnet.local - this is where you will put all your secret keys in.
Sign up or Log in to dashboard.vlayer.xyz and generate a new production Json Web Token (JWT).

Copy generated token (it won't be visible ever again) and save it in vlayer/.env.mainnet.local
VLAYER_API_TOKEN=...
Next provide a private key for deploying example contracts and sending transactions to the verifier in the vlayer/.env.mainnet.local file as
EXAMPLES_TEST_PRIVATE_KEY=0x....
By default, optimism is configured in the vlayer/.env.mainnet file. However, you can override this setting to use other chains.
To change the desired network, set the CHAIN_NAME and JSON_RPC_URL environment variables in vlayer/.env.mainnet.local.
Once configured, run the example from within the vlayer directory using:
bun run prove:mainnet
Web Proof example
First, install the vlayer browser extension from the Chrome Web Store (works with Chrome and Brave browsers). For more details about the extension, see the Web Proofs section.
Start web app on localhost:
cd vlayer
bun run web:dev
You can manually deploy WebProofProver and WebProofVerifier as well:
cd vlayer
bun run deploy:dev # deploy to local anvil
bun run deploy:testnet # deploy to testnet
❗️ Ensure the contracts are recompiled after every change with
forge build
The app will be available at http://localhost:5174 and will display buttons that will let you interact with the extension and vlayer server (open browser developer console to see the app activity).