Custom data source - quick guide
This guide walks you through setting up a development environment, configuring a custom data source, and generating/verifying Web Proofs using vlayer.
Setting up dev environment
Initialize new project using simple-web-proof template:
vlayer init my-web-proof --template simple-web-proof
Enter newly created project:
cd my-web-proof
Build contracts:
forge build
This step must be repeated whenever you modify the prover or verifier contract code.
Navigate to the /vlayer directory and install JavaScript dependencies:
cd vlayer
bun install
Start local devnet:
bun run devnet:up
In a separate terminal, run the example web application:
bun run web:dev
Configuring data source
Once the application is running, you can customize it for your chosen data source. We recommend first obtaining a web proof in your browser.
To configure a new data source, open vlayer/src/hooks/useTwitterAccountProof.ts and examine the steps[] attribute in the webProofConfig object.
Example logic is wrapped within a React Hook, but you can achieve the same thing in vanilla JS.
Now you can set up a new data source:
// specify starting page where extension redirects your user
startPage("https://x.com/", "Go to start page"),
// in case of authentication/redirect go to specific page
expectUrl("https://x.com/home", "Log in"),
// Specify which HTTP endpoint made by the browser from the visited website contains the data to be proven.
// This is typically an asynchronous request — you can inspect it using the Network tab in your browser's developer tools.
notarize(
    "https://api.x.com/1.1/account/settings.json",
    "GET",
    "Generate Proof of Twitter profile",
    [
    {
        request: {
        // redact all the headers
        headers_except: [],
        },
    },
    {
        response: {
        // response from api.x.com sometimes comes with Transfer-Encoding: Chunked
        // which needs to be recognised by Prover and cannot be redacted
        headers_except: ["Transfer-Encoding"],
        },
    },
    ],
),
More detailed description on JS SDK is available in Javascript > Web Proofs section.
If you picked any other data source than api.x.com you would need to regenerate your local API token that sits in vlayer/.env.testnet.
To configure https://api.example.com, run the following command:
vlayer jwt encode -p ./fixtures/jwt-authority.key --subject deadbeef --host "api.example.com" --post 443
Explanation of flags:
-p ./fixtures/jwt-authority.key— Uses a sample private key that generates a valid JWT for the local devnet. Do not modify.--subject deadbeef— Arbitrary identifier for local devnet use. Do not modify.
Obtaining Web Proof
Now you can navigate through example app in your browser (by default running on http://localhost:5137) and check if Chrome browser extension correctly redirects your user to data source. Extension supports Chrome and Brave browsers only.
Finding the correct data source HTTP endpoint can be tricky. We recommend using the Network tab in your browser’s Developer Console. To narrow down the results, filter requests by Fetch/XHR, which helps isolate relevant API calls from the rest.
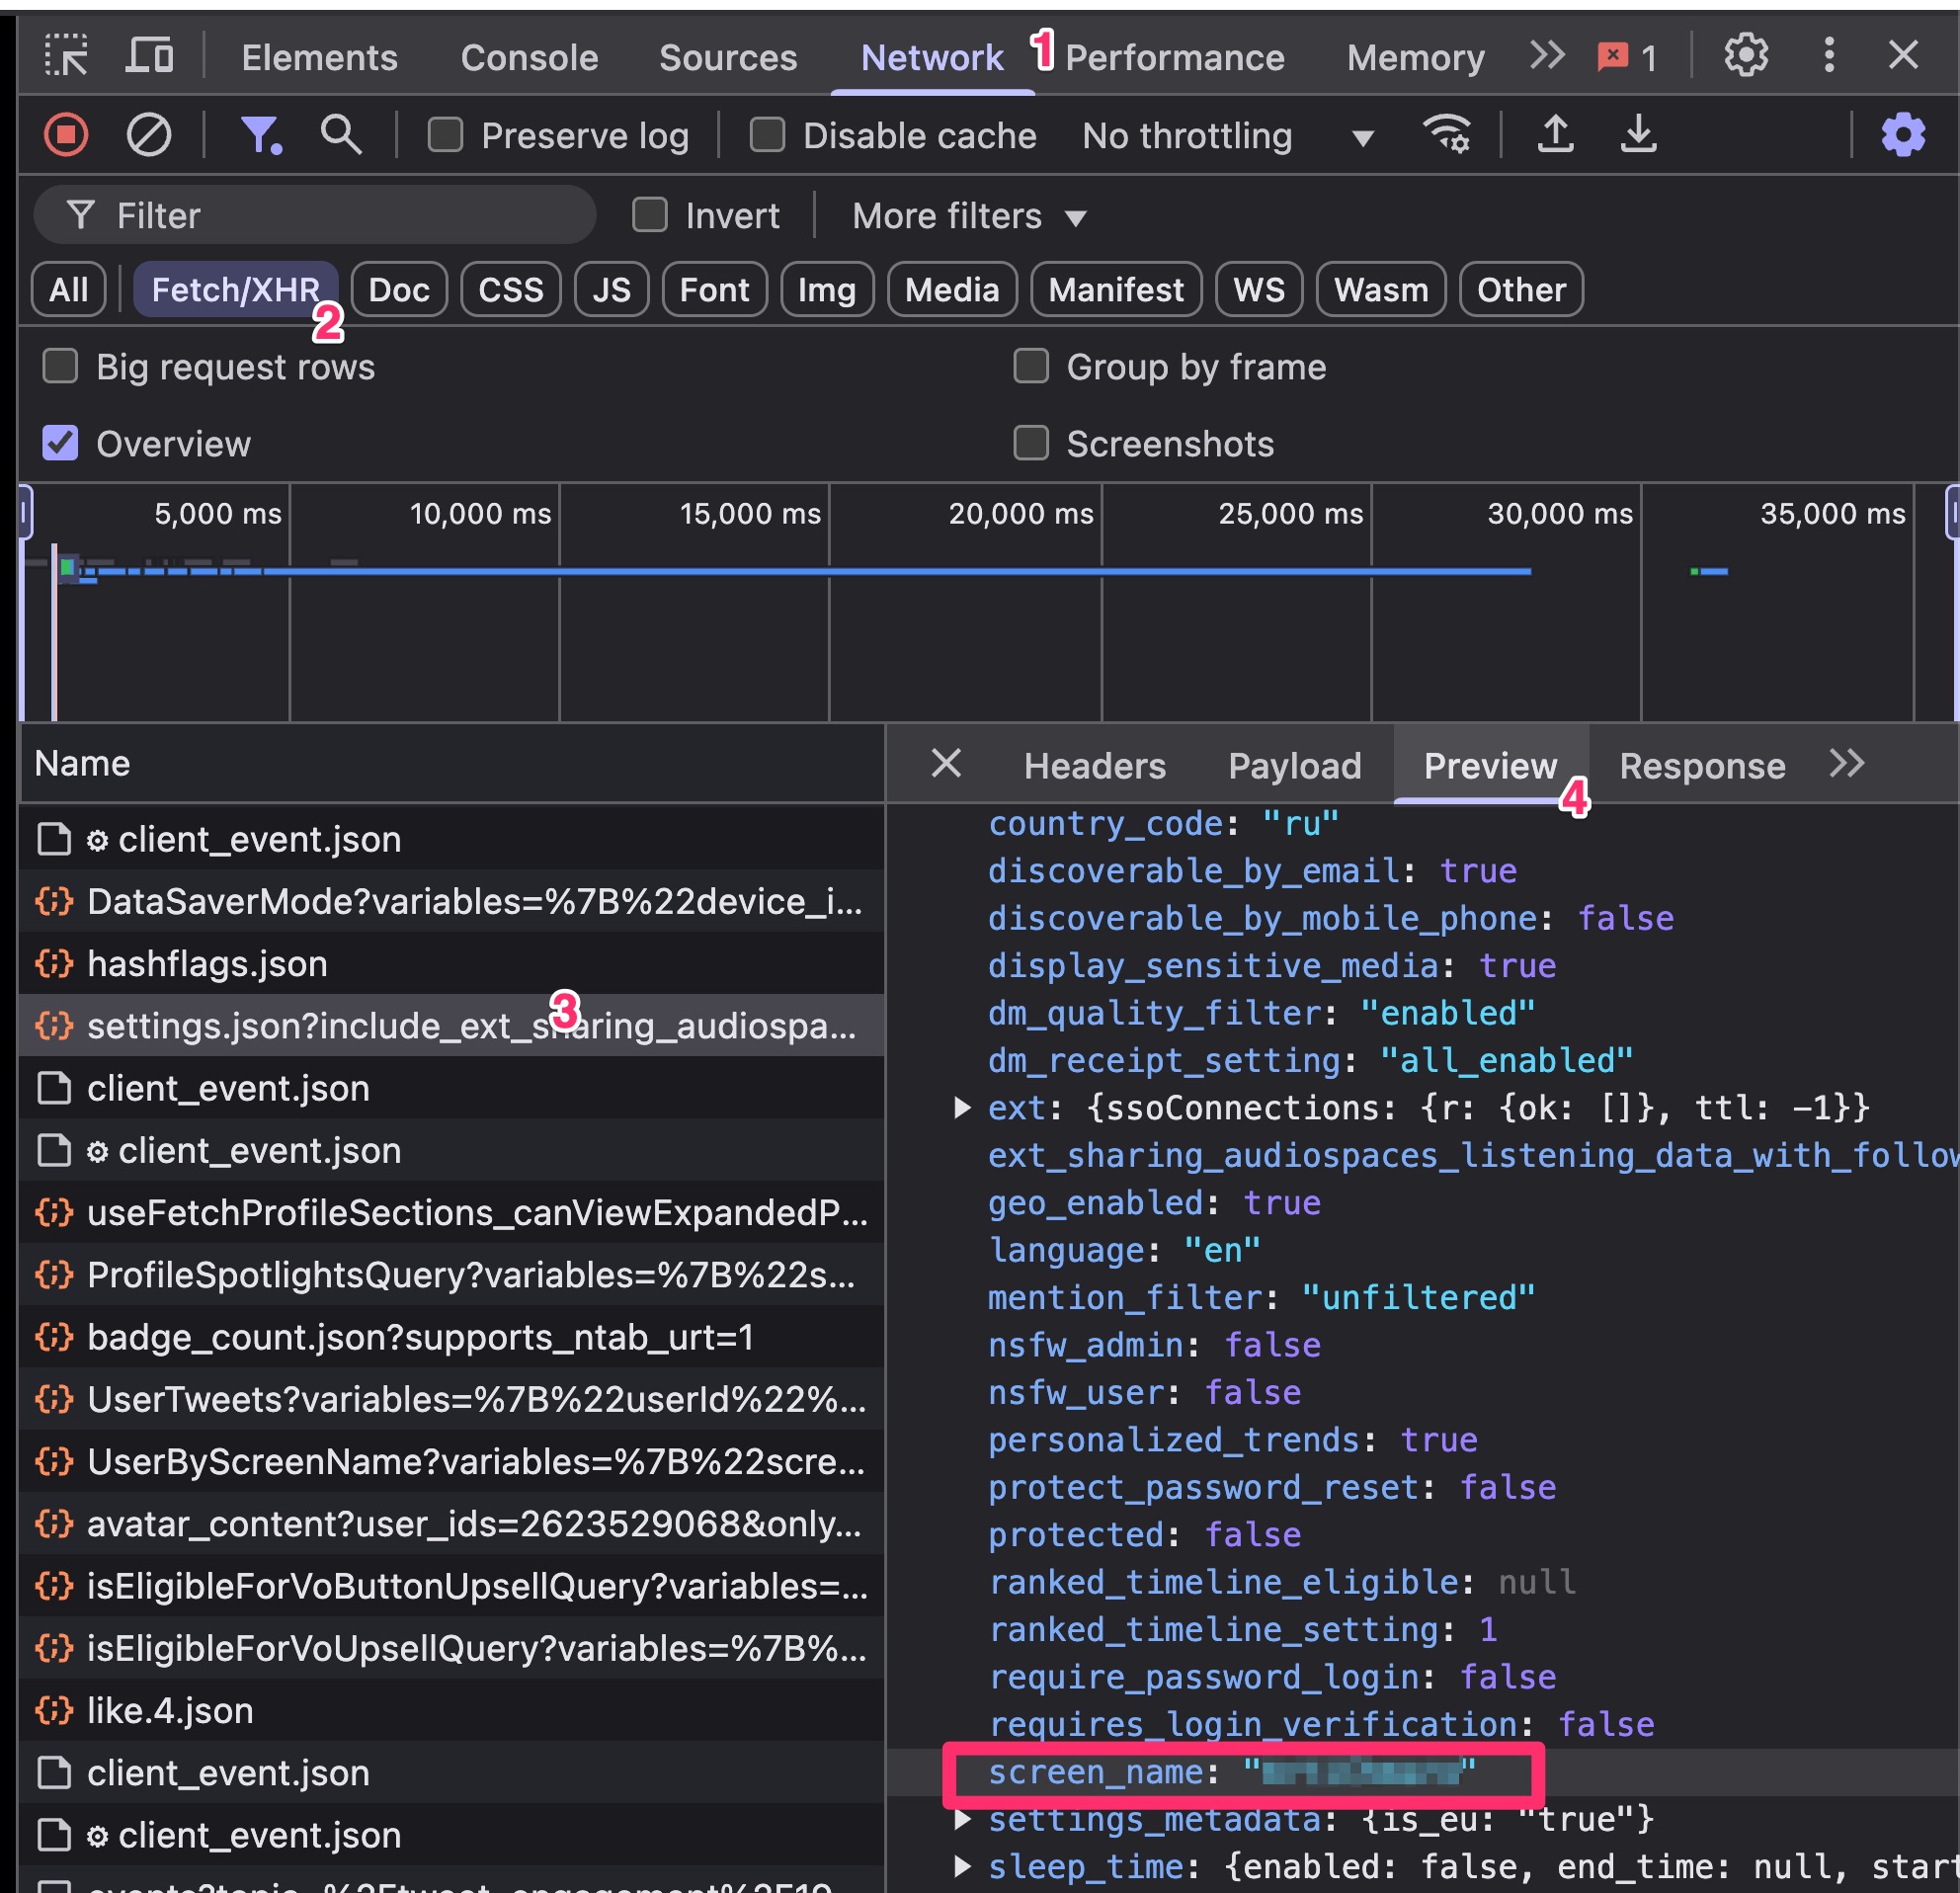
Finding the correct data source HTTP endpoint
A correctly generated web proof is stored in your browser's localStorage under the webProof key. To inspect localStorage:
- Open Developer Console (F12 or right-click > Inspect).
- Navigate to the "Application" tab.
- In the sidebar, find "Local Storage" and select your site's domain.
- Look for the key
webProof.
Generating ZK proof in the prover
After obtaining the Web Proof via the browser extension, it must be sent to the vlayer prover contract.
That is performed by callProver() function in vlayer/src/components/organisms/ProveStep/Container.tsx.
Through vlayer sdk proof is injected into prover contract: src/vlayer/WebProofProver.sol. Make sure that proper URL is checked there:
Web memory web = webProof.verify("https://api.x.com/1.1/account/settings.json");
Do not forget about building contracts and deploying them after any change in their code:
forge build
cd vlayer
bun run deploy:dev
Verifying on-chain
Once ZK proof is returned from prover it can be used for on-chain verification. Proof along with public inputs has to be passed to WebProofVerifier.sol using a write call:
const writeContractArgs: Parameters<typeof writeContract>[0] = {
    address: import.meta.env.VITE_VERIFIER_ADDRESS as `0x${string}`, // Verifier contract address
    abi: webProofProofVerifier.abi, // ABI for the verifier contract
    functionName: "verify", // Function to call for verification
    args: proofData, // ZK proof data to verify (proof + public input)
};
Whole logic for this step is available in handleMint() in vlayer/src/components/organisms/MintStep/Container.tsx file.
Common Issues / FAQ
Are there any limitations on the data that can be verified?
Currently, we only support JSON payloads. The maximum payload size per request and response is 10 KB.
Can I prove GraphQL responses?
No, this is not supported at the moment.
How can I debug extension errors?
- Right-click on the extension sidebar window.
- Select Inspect.
- Go to the Console tab.
Note: The extension console is separate from your webapp console.
Can I make assertions about JSON attributes?
Yes, assertions must be implemented in the Prover code. You can find more details here.